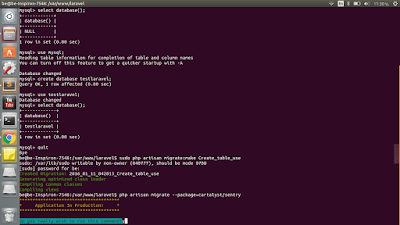
****ก่อนการสร้างTable ต้องสร้าง database ก่อน หากยังไม่ได้สร้างสามารถศึกษาได้จาก http://cnexplus.blogspot.com/2016/01/migrate-database.html
1. ทำการไป Folder ที่ต้องการสร้างโดยใช้คำสั่ง cd /var/www/laravel/ หากเข้าไปแล้วให้พิมพ์ sudo php artisan migrate:make Create_table_use ดังภาพที่ 1.1,1.2
ภาพที่ 1.1
จากนั้นไปทำการเปิดไฟล์ที่ได้ ซึ่งอยู่ใน /var/www/laravel/app/database/migrations/...
ทำการแก้ไขจาก
<?php
use Illuminate\Database\Schema\Blueprint;
use Illuminate\Database\Migrations\Migration;
class CreateTableUser extends Migration {
/**
* Run the migrations.
*
* @return void
*/
public function up()
{
//
}
/**
* Reverse the migrations.
*
* @return void
*/
public function down()
{
//
}
}
เป็น
<?php
use Illuminate\Database\Schema\Blueprint;
use Illuminate\Database\Migrations\Migration;
class CreateTableUser extends Migration {
/**
* Run the migrations.
*
* @return void
*/
public function up()
{
//
Schema::create('users', function($table)
{
$table->increments('id');
$table->string('fisrtname')->unique();
$table->string('lastname');
$table->string('email');
});
}
/**
* Reverse the migrations.
*
* @return void
*/
public function down()
{
//
Schema::drop('users');
}
}
ดังภาพที่ 1.2
ภาพที่ 1.2
2. เมื่อทำการแก้ไขแล้วให้เปิดไฟล์ database.php ซึ่งอยู่ ใน/var/www/laravel/app/config/database.php เพื่อทำการ configเมื่อเปิดแล้วให้ทำการแก้ไขให้ตรงกับ Database ของเรา
'mysql' => array(
'driver' => 'mysql',
'host' => 'localhost',
'database' => 'testlaravel',
'username' => 'root',
'password' => '12345',
'charset' => 'utf8',
'collation' => 'utf8_unicode_ci',
'prefix' => '',
),
'driver' => 'mysql',
'host' => 'localhost',
'database' => 'testlaravel',
'username' => 'root',
'password' => '12345',
'charset' => 'utf8',
'collation' => 'utf8_unicode_ci',
'prefix' => '',
),
ดังภาพที่ 1.3
ภาพที่ 1.3
3. เมื่อเสร็จแล้วให้กลับไปที่ Terminal อยู่จะอยู่ที่ /var/www/laravel แล้วพิมพ์ php artisan migrate --package=cartalyst/sentry เพื่อทำการ migrate ไฟล์ออกมา จะได้้ผลลัพธ์ดังภาพ 1.4 , 1.5
ภาพที่ 1.4
ภาพที่ 1.5
4. เมื่อทำการ migrateแล้ว ให้พิมพ์ php artisan config:publish cartalyst/sentry เพื่อทำการ config ไฟล์ ดังภาพที่ 1.6 , 1.7
ภาพที่ 1.6
ภาพที่ 1.7
5. เมื่อทำการ migrate แล้วจะได้ table ใน database ตามภาพที่ 1.8
ภาพที่ 1.8
============================END=============================


No comments:
Post a Comment